October 31, 2012

October Roundup/WIP Wednesday

It's the last day of October - where is this year going? Autumn is always my most productive time sewing-wise. I don't know if it is the weather that makes my sewing room so inviting or if it is the thought of Christmas and handmade gifts that urges me to spend hours crafting. Probably a little of both.
Det er siste dagen i oktober - hvor ble det av dette året? Jeg er alltid mest produktiv om høsten. Mulig det er det dårlige været som gjør syrommet forlokkende eller presset av julen som nærmer seg. Kanskje litt av begge deler.

NB! If you want to participate in a Pay it Forward swap/giveaway and receive something handmade by yours truly click here.

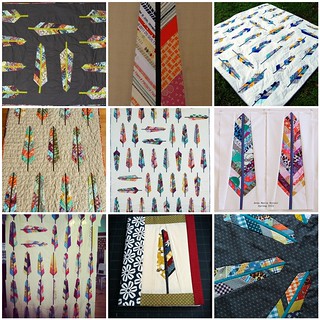
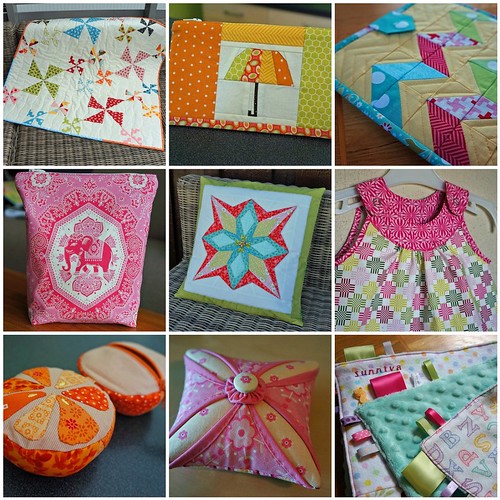
COMPLETED PROJECTS/FULLFØRTE PROSJEKTER

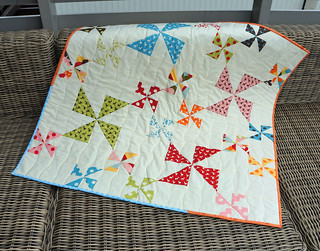
Windy City Days baby quilt
Windy_Days_Quilt_On_Couch


My very first tutorial!
Fabric origami ornament tutorial


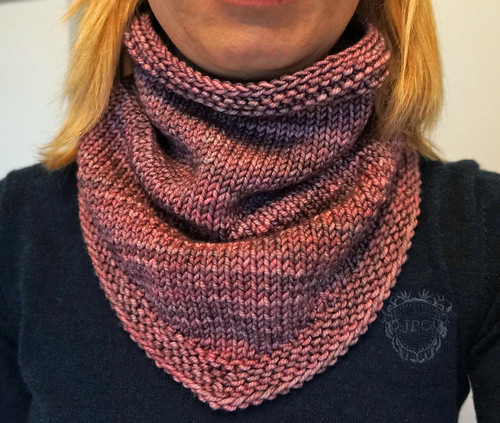
A cozy knit bandana cowl
Bandana-cowl-onbody


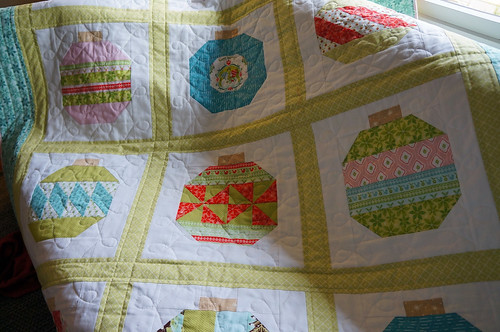
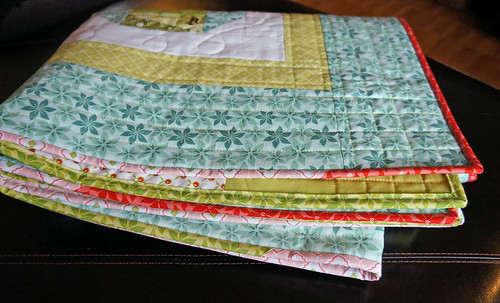
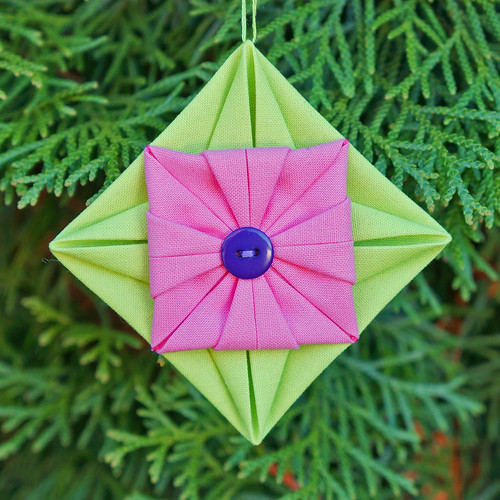
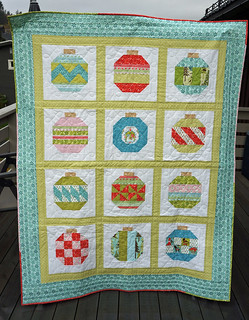
Vintage Holiday throw quilt
Vintage-Holiday-full-front


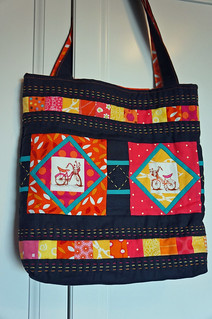
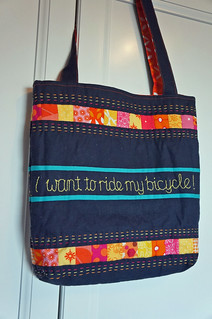
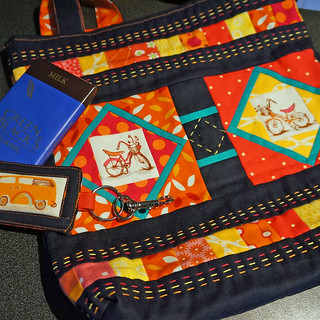
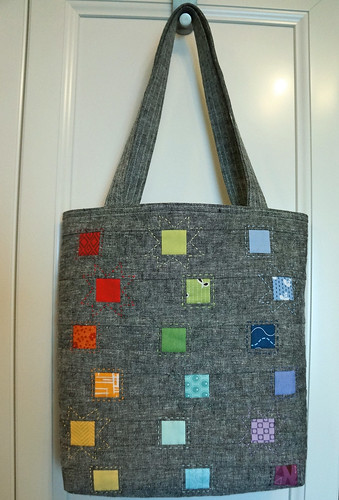
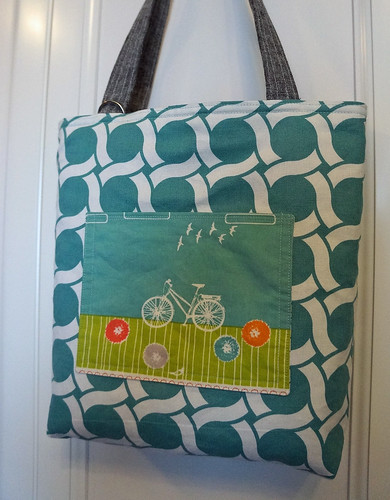
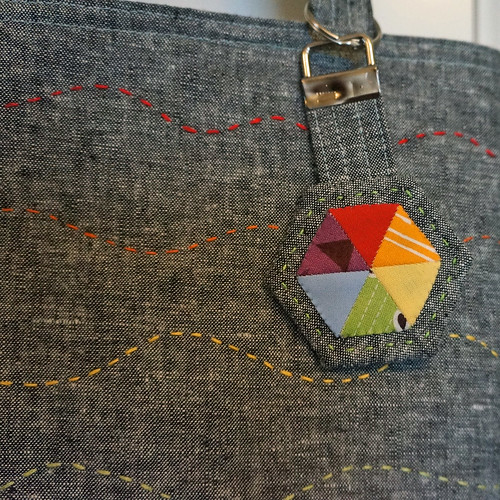
Reversible tote and key fob for Mouthy Stitches swap
Mouthy Stitches 2 Completed Tote


WIPs/I PRODUKSJON

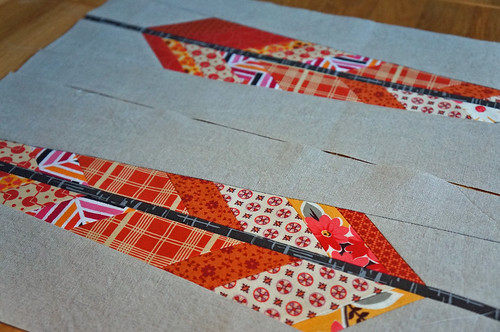
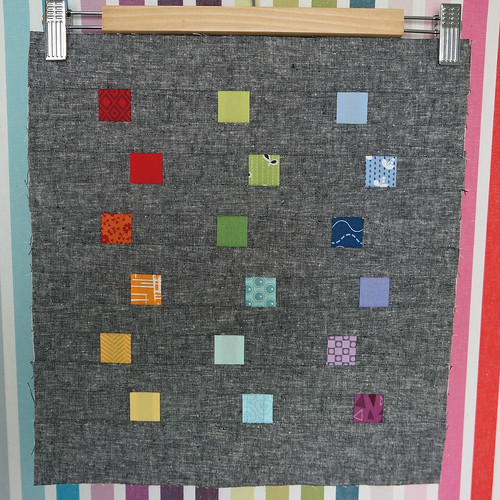
New: Feather table runner - here are my completed blocks, mainly in Chicopee with some Flea Market Fancy and Madrona Road mixed in. I was only intending to make 4 feathers, but that was not enough, so I added 2 with only one striped side.
Feathers-orange-WIP


Feathers-purple-WIP


Feathers-multi-WIP


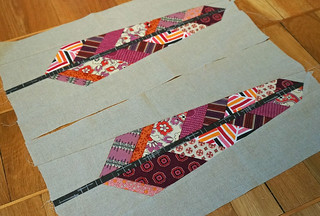
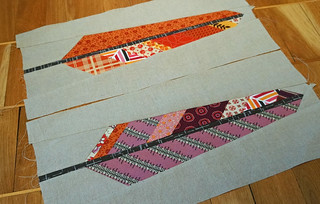
I am thinking this will be the layout of the runner
Feathers-layout-WIP


NOVEMBER GOALS/MÅL FOR NOVEMBER

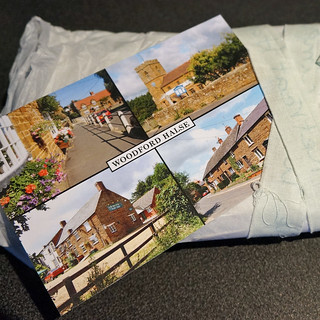
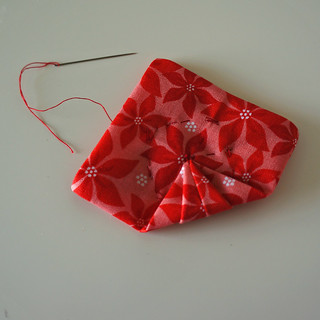
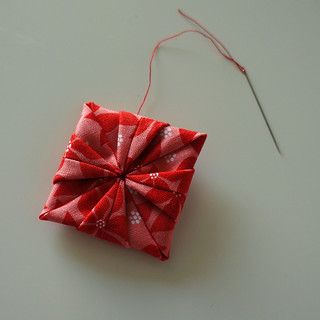
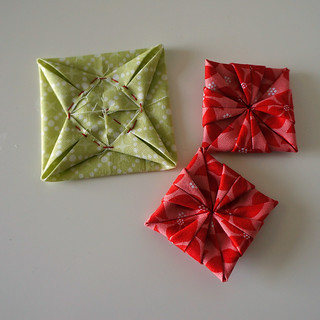
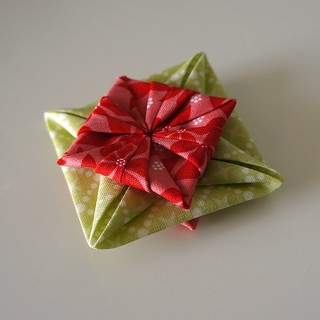
  • Make a thank-you gift for my grandparents (sooo overdue)/takkegave til besteforeldrene mine
  • Sew a baby blanket and quilt for niece/nephew due mid-December/babyteppe og quilt til fremtidig tantebarn
  • Table runner for Modern Christmas Tablerunner swap/juleløper til nok en byttegruppe
  • Knit sweater for babygirl/strikkegenser til lillejenta
  • Mixer cover tutorial for 100-Day Hustle/lag mønster til trekk til kjøkkenmaskin
  • Sew 2-3 christmas gifts/sy 2-3 julegaver
Hmm, that is quite a bit...
Ja, det var visst en god del...


Linking up with:

Slow Bloggers Linky Party - hosted this month by Martha at Weekend Doings. I may not have been a slow blogger this month, but I certainly am one at times and I am a supporter of the "movement".
Knotted Cotton


WIP Wednesday at Freshly Pieced
WIP Wednesday at Freshly Pieced

Fresh Sewing Day and Small Blog meet at Lily's Quilts
Lily's Quilts
Lily's Quilts


October 30, 2012

Pay it Forward - a handmade swap

EDIT: Sign-ups are now closed

A little while ago (I'm a bit embarrased to say how long) I was selected to receive a handmade gift from Melissa of issa.ino: handmadeas a part of a Pay it Forward handmade gift "exchange".

Would you like to receive a handmade gift from me for no reason other than to spread some love?
If you do - here are the rules (very few strings attached):
  1. I will create a handmade gift for 3 randomly chosen people who leave a comment below. The item will be a surprise and will arrive to you within the next 365 days.

  2. In signing up for Pay it Forward, you are committing yourself to the project (if you are chosen, but feel free to start your own chain if you're not chosen)... someone pays it forward to you, then you must pay it forward to others!

  3. You need to have an active blog of your own or some way to post your PiF info like flickr, pinterest, facebook or twitter. Basically you'll need a place to announce your own PiF and to post some photos of the process.

  4. If you are chosen, post something similar on your blog/selected platform so you can spread the Pay it Forward love. I'll email you asking for your mailing address (and your blog/facebook/twitter/etc address where you'll be spreading the love). Please make sure your email address is visible on your profile or leave it in the comment so I can get ahold of you if chosen.
In simple terms, if you are chosen, you have to keep the chain going by writing a similar post on your blog (or other platform) and make 3 gifts within 1 year.

So you want to play? Leave a comment below and 3 of you will be randomly selected on Sunday November 4th. I'll update this post when I do the draw.

Now, wonder what Melissa is making for me... How many more days must I wait, I wonder...

October 29, 2012

Out of my comfort zone

If you've been seen almost any of my work, you will know that I like bright colors and geometric patterns. But somehow, the Feather Bed Quilt Pattern by Anna Maria Horner, caught my attention and became something I had to try.
Hvis du har sett noe av det jeg har lagd tidligere, vet du at jeg liker klare farger og geometriske mønstre. Men da jeg fikk øye på dette fjær-mønsteret av Anna Maria Horner ble det etter hvert noe jeg måtte prøve.


Here are some variations made by AMH herself and various other bloggers.
Her er noen varianter lagd av Anna Maria og diverse andre bloggere.
AMH Feather Quilt Mosaic


Not only am I stepping away from my usual geometricness, I am also using fabrics that are not my usual self. Here are my first two feathers (I only plan on making four). I think they will turn into an autumnal table runner/topper.
Ikke bare har jeg gått bort ifra mitt vanlige geometriskhet, men jeg har brukt farger som heller ikke er helt meg. Her er mine første to fjær (jeg skal bare lage fire). Jeg tror det blir en høstløper.
Feathers-orange-WIP


Lining up the angled pattern pieces and working with a wobbly linen blend was a little bit tricky, but the blocks can easily be trimmed at the end.
Det var litt vanskelig å få de skjeve delene (i en "nervøs" linmix) til å møte opp helt korrekt, men blokkene kan enkelt rettes opp til slutt.

The feathers are enormous - the block is 16" long and the feather is just a little bit shorter!
Fjærene er digre - rett under 40 cm lange!

I had intended on making a thank-you gift for my grandparents out of this, but I think I will keep these for myself. That means I need to add something else on my to-do list...
Jeg hadde tenkt å lage en takkegave til besteforeldrene mine med disse, men jeg tror jeg beholder de selv. Det betyr at jeg må føre på noe til på gjøre-listen min...

Linking up to:
Plum and June

October 26, 2012

Doing the Happy Mail Dance!

I was on my way out to run an errand when I peeked in my mail box and spotted a package for me. When I saw who it was from, my heart started racing, I was so excited.
MS-Tote-recd-from-label


I had to run my errand before opening the package, so I literally ran (no small feat as the first leg was a 200 meter hill going up, while pushing a 25 lb baby in a stroller), just so I could get home as soon as possible. Well, I stopped running when I could taste blood in my mouth...

Well home again I opened the package carefully to find a tissue-wrapped gift and a card showing the cute village where Susan lives.
MS-Tote-recd-package-card


I ripped the paper off - and there it was - the tote bag from the Mouthy Stitches swap that I had been salivating over for the last weeks. Even more beautiful and vibrant in real life than on photos. My photos don't do it justice...
MS-Tote-recd-full-front

MS-Tote-recd-full-back

Not only was there a tote bag - I also received a super cute key fob and some delicious chocolate (which I had to taste fairly quickly after taking the photograph, being the chocolate-lover that I am).
MS-Tote-recd-with-swag


Don't you just love the stitching she did on the tote? Susan is the queen of quilting with perle cotton!

See how happy I was to receive this? Very happy!
MS-Tote-recd-geeky-happy


So THANK YOU, SUSAN - I feel like a lucky ducky right now! And if you don't know Susan, I highly recommend checking out her blog. She is super talented, funny and sweet - one of my very favorite bloggers (I am not only saying that because she sent me this tote and she didn't pay me to say it either).


October 23, 2012

I'm on a roll!

One more finish to report - I am really getting stuff done this month!
Nok et fullført prosjekt - jeg er virkelig produktiv denne måneden!

This is the tote bag I made for the Mouthy Stitches swap - I can't say where I've sent it as it is a secret.
Dette er vesken jeg lagde for Mouthy Stitches byttegruppe - men jeg kan ikke si hvor den ble sendt for det er hemmelig.
Mouthy Stitches 2 Completed Tote
The exterior has "cascading" rainbow squares which I quilted with regular DMC embroidery floss - mostly squares but a few wonky stars are hiding in there too! The back was quilted with organic waves in rainbow colors. The main fabric is Essex yarn dyed linen in black.
Utsiden har regnbueruter som jeg quiltet med broderigarn - mesteparten er ruter, men det er noen stjerner inni der også! Baksiden quiltet jeg med bølgende linjer. Hovedstoffet er Essex yarn dyed linblend i svart.

I was hoping for a more vibrant exterior and was surprised how the linen fabric really changed the appearance of the bright squares! But all in all, I am pleased with the result.
Vesken skulle være litt sprekere i fargen og jeg ble overrasket over hvordan linstoffet endret utseende på de fargesterke rutene! Men jeg er fornøyd med sluttresultatet allikevel.
Mouthy-Stitches-2-finished-full-front

The interior fabric is an organic canvas from Cloud 9 - a fabric I think I will have to stock up on in more colors/designs. A) because it is very nice and B) because I think organic cotton is the way to go. The pocket is from Birch fabrics and is also organic.
Fôrstoffet er et økologisk canvasstoff - et stoff jeg liker godt og tror jeg skal kjøpe mer av i flere farger. Lommen er også i et økologisk stoff.
Mouthy-Stitches-2-finished-lining


And then I made this little hand sewn EPP key fob - which took more hours than it possibly deserved as it was supposed to be a little add-on gift... But it turned out cute. And I did put new hardware on after seeing this photo, because I did really mangle the metal during construction.
Og så lagde jeg en liten håndsydd nøkkelring (som tok alt for mange timer). Jeg måtte bytte metalldelen etter jeg tok dette bildet, for man kan se ganske godt at det ble klemt stygt sammen.
Mouthy-Stitches-2-finished-keyfob


So there, my first proper swap item completed and sent on its way! I hope my partner likes it and I think more swaps will be in my future because this was fun!

Now, I wonder when I will receive my tote bag in the mail (and where it is coming from)...

PS: Interesting fact - the light blue solid on the top right of the tote front and on the key fob is shirting material used for the Norwegian Police - the company I work for used to make their shirts and this a cutting from one of the productions. There "may" be some polyester in this fabric...
PS: Interessant fakta - det lyseblå stoffet øverst til høyre på fremsiden av vesken og på nøkkelringen er skjortestoff brukt til norske politiet - selskapet jeg jobber for lagde disse skjortene før og dette er et klipp fra en av produksjonene. Det er "muligens" noe polyester i dette stoffet...


October 18, 2012

Vintage Holiday Quilt - DONE!

Vintage-Holiday-on-couch

It's the last day of the Vintage Holiday Quilt-Along and I am finished just in time! I only wish the weather were nicer, so I could have gotten better photos...
Siste dag av Vintage Holiday Quilt-Along og jeg ble akkurat ferdig! Skulle bare ønske været var litt mer medgjørlig for fotografering utendørs...

Vintage-Holiday-full-front


The front is made of a layer cake of Alpine Wonderland from Riley Blake, pluss some other fabrics from my stash; sashing is Vintage Baby from Riley Blake; border is a pointsettia print from the Alpine Wonderland collection.
Forsiden er sydd sammen av en "layer cake" av Alpine Wonderland fra Riley Blake, samt noen andre stoffer fra stashen min. Rammene er Vintage Baby fra Riley Blake, borden er fra Alpine Wonderland.

Vintage-Holiday-partial-front


I quilted straigh(ish) lines in the sashing and border. The blocks are quilted with a free motion swirl. My free motion skills are mediocre at best - uneven stitch lengths and some jagged curves, but that is hard to see without close inspection.
Jeg quilted (nesten) rette linjer i rammene og borden. Blokkene quiltet jeg "free motion" - ikke det jeg er flinkest på, men det ser man ikke uten nær inspeksjon.

Vintage-Holiday-back


I pieced the back with the left overs from the front and some green solid (also from Riley Blake). The batting is Warm & White.
Jeg brukte opp noen av restene fra forsiden på bakstykket sammen med et grønt ensfarget stoff. Vatten er Warm & White.

Vintage-Holiday-folded

The binding is scrappy, as I felt all red would be too harsh, but I still wanted some of the warm colors in the binding. I machine sewed the binding - no time to sew by hand!
Lukkekanten ble variert, da jeg syns bare rødt ble litt voldsomt, men ville allikevel ha de varme tonene i lukkekanten. Jeg maskinsydde lukkekanten (ikke tid til håndsøm).

Now I just have to wait until December so I can snuggle under my new quilt on the couch!
Da er det bare å vente til desember så jeg kan bruke dette teppet!

Thanks, Heidi, for hosting this quilt along! It was my first ever and it was fun to be a part of it and see all the variations everyone came up with.

October 16, 2012

Look Mom, I've been knitting!

A couple years ago my mom got tired of me asking her to knit things for me, so she got me a how-to book and some yarn and needles for my birthday. That's more than a hint!
For et par år siden ble mor lei av at jeg ba henne strikke ting til meg og gav meg en strikkebok, garn og strikkepinner i bursdagsgave. Det var mer enn et hint!

Now I enjoy knitting although I am only a novice and would like to get better. Like Nat who knits very beautiful things.
Nå liker jeg å strikke, selv om jeg fortsatt er en saktestrikkende nybegynner, men jeg vil gjerne bli bedre.

On my autumn to-do list was a chunky cowl for myself and when I found the Bandana Cowl pattern at Purl Bee, I decided it would be perfect for me. I had to learn one new technique (short rows) but otherwise it was very straight forward.
Jeg hadde lyst til å strikke en "hals" og da jeg fant "Bandana Cowl" mønsteret syns jeg det passet bra. Jeg måtte lære en ny teknikk (forkortede pinner), men ellers var det grei kjøring.
Bandana-cowl-flat

Yarn: Madelinetosh Tosh Chunky in Night Bloom - this yarn is super soft and has a beautiful sheen
Needles: US 9 (5,5mm) 16" circular (I bought lovely bamboo needles to go with my fancy yarn)
Garnet er Madelinetosh Tosh Chunky og er et deilig ullgarn med fantastisk fin glans.
Jeg strikket med rundpinne (40 cm) nr 5,5 - jeg kjøpte bambuspinner til å strikke med dette flotte garnet.

Here is myself looking all stylish (ha ha) with my new cowl. I love how it covers the opening of a v-neck sweater and how well it covers my neck. Perfect for the cold Norwegian winter!
Her modellerer jeg halsen. Jeg liker at den dekker åpningen på en v-halsgenser og hvor godt den dekker halsen min. Perfekt for en kald norsk vinter!
Bandana-cowl-onbody

I might be making some more of these. I think they will make for good gifts...
Kan hende jeg lager flere slike. Jeg tror de vil være fine gaver...

October 11, 2012

Let's Get Acquainted! (my day on the blog hop)

Hi and welcome to my day on the Let's Get Acquainted! Blog Hop, hosted by the wonderful Beth at Plum and June.
Plum and June

My name is Marit (pronounced Mah-ritt) and I am a Norwegian-American living just outside Oslo, Norway with one husband (yes, only one)), one baby girl and one cat. I looooove all stitchy activities - sewing, quilting, crocheting, knitting, embroidery, you name it! I also love baking, chocolate, a good glass of red wine and travelling. I wish I loved exercising and vegetables as much as sewing and sweets...

I've been blogging 4 months now. Let's start off with showing you my completed projects - as you can see, I love color!
Completed Projects 10/10/2012


Now - let get down and dirty with some details about me (me, me, me)!

How long have you been quilting: I made my first actual quilt when I was 13 (it's kind of ugly, so I won't show it to you) and since then I've been quilting on and off the last 18 years. If you don't want to do the math, that makes me 31 years old.

Favorite blogging tip: Be social and make friends. Comment on other blogs and reply to all comments on your blog (as much as possible). Flickr is a great place to meet like minded crafters by joining different groups and swaps (and bees, but I haven't tried that yet).

Favorite chocolate: Milk chocolate, with or without nuts. And white chocolate Toblerone.

WIP: Vintage Holiday quilt - waiting to be basted, quilted an bound
Vintage Holiday Quilt Top


Favorite craft book: I have too many and hardly make anything from them... But I really like the projects in Zakka Style. The Fat Quarterly Shape Workshop has a lot of great modern blocks and projects. And if you don't already subscribe to the Fat Quarterly e-zine, I highly recommend it.

Favorite cookie: Chocolate chip cookies (this is my favorite recipe), with cold, cold milk to drink.

Favorite quilting tool: Besides the usuals, I love using stick-on leather thimble dots when hand quilting/embroidering/hand sewing binding . So much more comfortable than your traditional thimble!

Binding by hand or machine: By hand if the back will be seen, by machine if not (table runners, for example).

Favorite wines: Riojas, Cabernet Sauvignons and Syrahs/Shiraz. Or a good, dry Riesling. Mmmm, mmmm, mmmm! (Don't worry, I don't have a drinking problem. In fact, with being either prego or nursing the last 16 months, wine has been a low priority in my life.)

WIP: Front panel for tote for Mouthy Stitches 2 Swap
Mouthy_Stitches_2_front_WIP


Wish I'd know before starting blogging: How fun and social it would be and how much time it takes. A lot of time!

Favorite places to visit: Italy is beautiful (well, Norway is too, but that's just home to me). England is friendly. Copenhagen, Dublin and Edinburg are perfect sized big cities. Japan is on the wish list... And a safari in Africa would be cool...


My tutorial for you can be found in the post below or by clicking here. I have channeled my inner Elizabeth Hartman (if you have her books, you will know what I mean) and made some color options at the end for your inspiration:)

Ornament_cover


Check out the tutorial and let me know what you think! And then check out the other blogs on the blog hop this week:

Oct 9
         Amy from Sew Incredibly Crazy
         Foster from Foster Reviews It
Oct 11
        Chrissie from madebyChrissieD

Thank you so much for stopping by - leave me a comment and Let's Get Acquainted!

-Marit

Fabric Origami Ornament (Tutorial)


Origami fabric ornament tutorial

This is my favorite fabric ornament to make. It is very easy to sew and is sewn all by hand - perfect if you want to get out of your sewing space for a while:) And for a very inexpensive item, it sure looks fancy (i.e. it makes a great gift).


Materials needed:
Ornament_materials


  • 3 fabric* squares (one for center, two for front/back) - 5" squares are easy, 4" squares make dainty ornaments
  • 2 buttons/beads for embellishing center
  • String/yarn for hanging loop
  • Needle, thread, scissors
*Fabric should be "creasable", not fray too easily and not be too thick. Most quilting cottons work well. I haven't tried it, but spray starching the squares might be useful if using thinner fabric.

USEFUL TIPS:
  • Finger press all folds in all steps.
  • Fold and tack in place on side at a time for all steps (then you don't have to pin anything)
  • Cut you thread long enough to last for the whole piece

Step 1: Fold square in half and finger press crease, open up and repeat in other direction to make a creased cross in the center.
Ornament_step1

Step 2: Fold two opposing sides in towards center and tack in place at center.
Ornament_step2

Step 3: Fold the other two long sides in towards center and tack in place.
Ornament_step3a

Ornament_step3b

Ornament_step3c

Step 4: Place a finger in one of the "ears" and flatten into a square. Tack in place. Repeat for the other three sides.
Ornament_step4a

Ornament_step4b

Ornament_step4c

Ornament_step4d


Step 5: Fold the sides of one of the little squares in to make a point and tack together. Sew all the way around, tacking in place on the sides of the "arrows" and where the folds meet.
Ornament_step5a

Ornament_step5b

Ornament_step5c


For center square: You are now finished. Just fasten the thread and cut it off. The back side should look like this - don't worry, all the stitches and raw edges will be covered:
Ornament_step5d

For front/back squares: Continue with step 6.

Step 6: Fold one corner towards the center of the back and tack in place. Repeat for the other three sides. Fasten the thread and cut it off.
Ornament_step6a

Ornament_step6b

Ornament_step6C


Okay - almost there!

If you have made all your three squares you should have something that looks like this:
Ornament_completed_parts

Step 7: Make a sandwich of your pieces (you should be able to use your crease lines from step 1 to see where the front/back points should meet) and tack together at all corners of the front/back.
Ornament_step7a


Ornament_step7b

Step 8: Sew your embellishments to the center front and back (sew through the sandwich) and sew a string through one of the points of the center (green) square to make a hanging loop. Congratulations, you are finished!

Front view:
Ornament_finished_front


Back view:
Ornament_finished_back

And it will look something like this hanging on your tree:
Ornament_modern


Alternative 1: Make it classic! (Gold fabric is a very thin laminate)
Ornament_classic


Alternative 2: Make it neon! How cool would a tree filled with these look?
Ornament_neon


So, this is my first tutorial ever written. I hope it makes sense! If you make one of these, send me a pic or link to a blogpost - I would love to see what color combinations you come up with.

-Marit